")

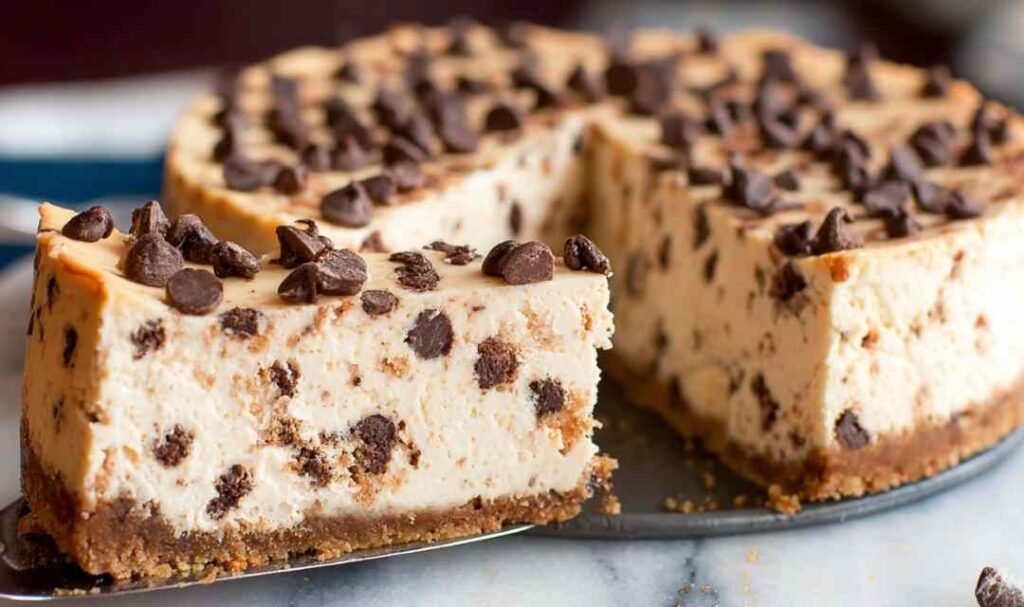
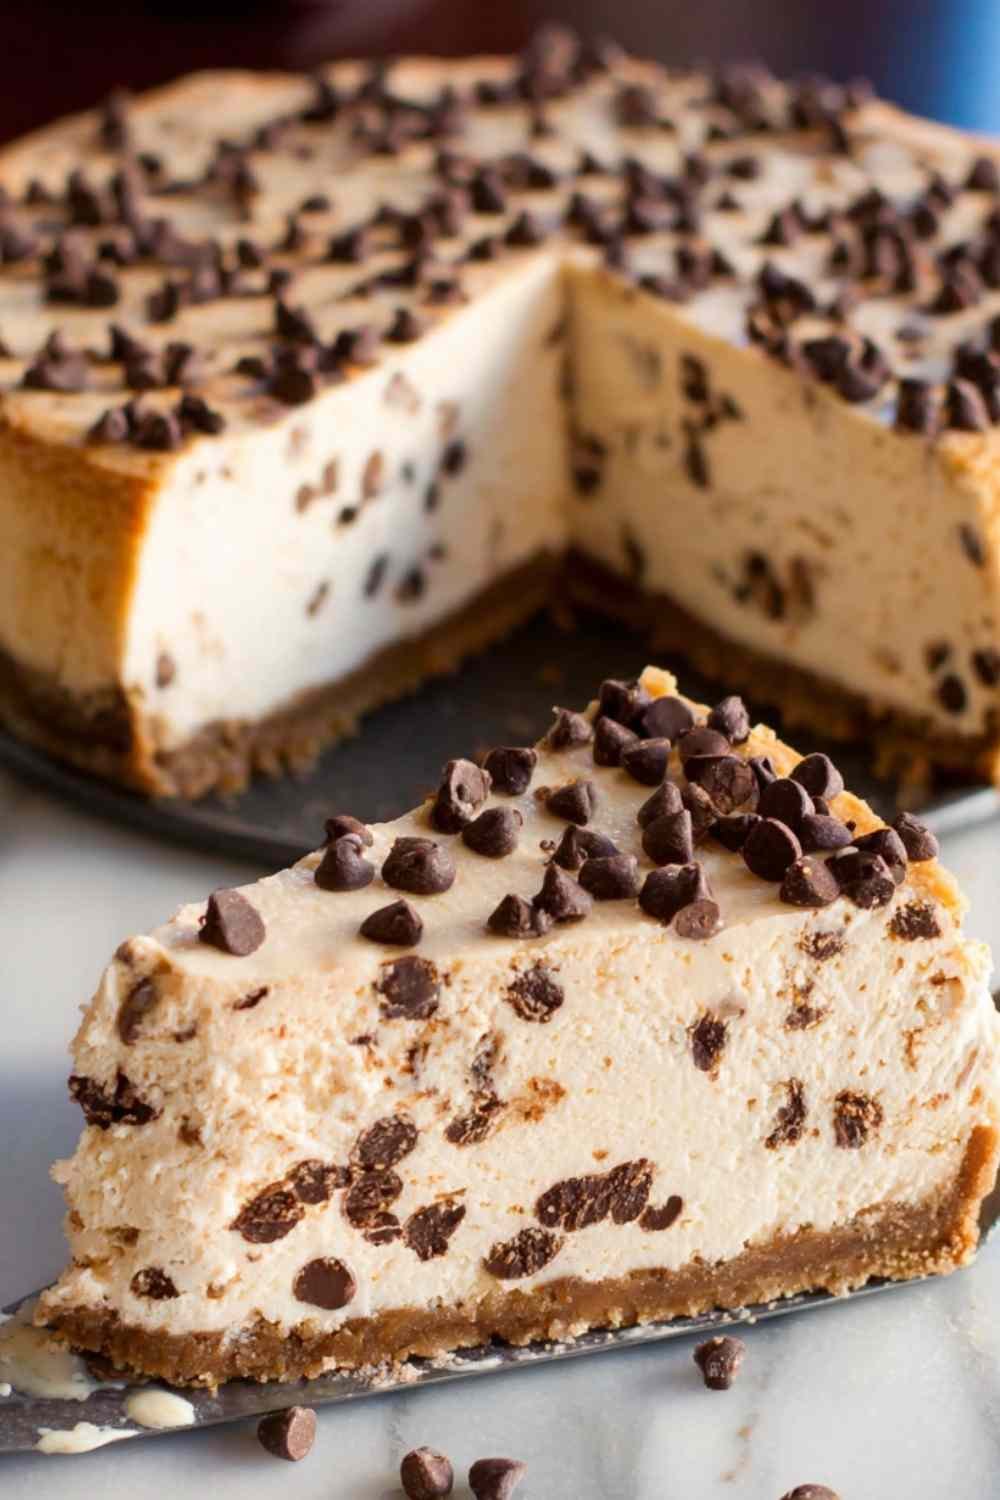
Protein cheesecake is what happens when a classic New York-style dessert gets a serious nutritional upgrade. Each slice delivers up to 25 grams of protein, and the texture is genuinely creamy and rich — not chalky or dry like a lot of high-protein desserts tend to be. I started making this after looking for a post-workout treat that actually felt indulgent, and this one has been on repeat ever since.
I remember the first time I brought this to a get-together and did not mention it was a high-protein recipe. Every single person asked for the recipe before leaving. That is the thing about this protein cheesecake — it does not taste like a compromise. It tastes like real cheesecake. The filling comes together in minutes with a food processor, it works with multiple crust options, and you can customize the flavor in so many directions. Whether you are eating for fitness goals or just want a dessert that does not derail your week, this one delivers. Prepare to be amazed!
Table of Contents
Ingredients for Protein Cheesecake
I always use full-fat cream cheese here because it gives the filling that dense, classic cheesecake structure that holds up after chilling. For the protein powder, my preference is a vanilla or unflavored variety so it blends seamlessly without an aftertaste.
For the Filling:
- 24 oz cream cheese (or vegan cream cheese), at room temperature
- 2 cups plain Greek yogurt (or dairy-free alternative) — in my experience, full-fat Greek yogurt gives the creamiest result
- 1/2 cup protein powder (vanilla or your preferred flavor)
- 2/3 cup sweetener of choice (sugar, maple syrup, honey, coconut sugar, or xylitol)
- 2 1/2 tsp pure vanilla extract — I recommend a pure extract rather than imitation for the cleanest flavor
Graham Cracker Crust (Classic Option):
- 2 cups graham cracker crumbs
- 6 tbsp softened butter
- 2 tbsp sugar (optional)
Keto Almond Flour Crust (Low Carb Option):
- 2 cups almond meal or pecan flour
- 1/4 tsp salt
- 6 tbsp melted coconut oil or butter
Step-by-Step Instructions
I recommend reading through the full instructions once before starting — the chilling time is the longest part, so plan to make this the day before you need it for best results.
Step 1: Take the cream cheese out of the refrigerator and let it come fully to room temperature. This usually takes about 30 to 45 minutes and makes a huge difference in achieving a smooth, lump-free filling.
Step 2: Preheat your oven to 350 degrees F. Fill a baking pan about two-thirds full with water and place it on the lower oven rack. This water bath adds humidity to the oven and helps prevent cracking.
Step 3: Prepare your crust by mixing the ingredients together until combined, then press firmly and evenly into a 9-inch springform pan. Refrigerate for at least 1 hour before adding the filling.
Step 4: In a food processor or using electric beaters, blend the cream cheese, Greek yogurt, protein powder, sweetener, and vanilla extract just until smooth. Stop as soon as everything is combined — overbeating adds air bubbles that can cause the top to crack during baking.
Step 5: Pour the filling evenly over the chilled crust and smooth the top with a spatula. Place the springform pan on the center oven rack, directly above the water pan. Bake for 30 minutes without opening the oven door.
Step 6: Without opening the oven door, turn off the heat and let the cheesecake sit inside for an additional 5 minutes. This gradual cooling step is what prevents surface cracking. Remove from the oven and cool on the counter for about 20 minutes, then refrigerate for at least 6 hours or overnight before slicing.
What to Pair with Your Protein Cheesecake
Protein cheesecake works beautifully as a standalone dessert, but pairing it with lighter high-protein options creates a well-rounded spread for any occasion.
Fresh Berry Topping: Sliced strawberries, blueberries, or raspberries add brightness and natural sweetness that cuts through the richness of the cream cheese filling beautifully.
Protein Banana Pudding: Serving this protein banana pudding alongside individual slices of cheesecake creates a full high-protein dessert table that works great for meal prep days or casual gatherings.
Blueberry Cottage Cheese Bowls: These baked blueberry cottage cheese bowls are a natural complement to protein cheesecake — same high-protein philosophy, different texture and flavor profile.
Lemon Raspberry Cottage Cheese Bake: The tangy, bright flavor of this lemon raspberry cottage cheese bake pairs wonderfully next to a slice of vanilla or berry-flavored protein cheesecake on a dessert spread.
5-Ingredient No-Bake Protein Bars: For a grab-and-go protein snack alongside your cheesecake slices, these no-bake protein bars are a simple and satisfying option that keeps the whole spread fitness-friendly.
High Protein Egg White Crepes: If you are serving this cheesecake as part of a brunch spread, these high protein egg white crepes balance the sweet richness with something light and savory on the side.

How to Store and Serve Protein Cheesecake
Store your protein cheesecake covered in the refrigerator for up to 4 days. I recommend keeping it in the springform pan with plastic wrap pressed lightly over the top for the first day to protect the surface while it finishes setting.
For longer storage, this cheesecake freezes well for up to 4 months in an airtight container. Slice it before freezing so you can pull out individual portions without thawing the whole cake. Thaw overnight in the refrigerator before serving — do not try to speed up the thaw at room temperature as the texture can suffer.
Pro tip: run a warm knife along the edge of the springform pan before unlatching it for a clean release every time. Serve slices cold straight from the refrigerator for the best, firm texture.
Conclusion
This protein cheesecake is one of those recipes that proves healthy eating does not have to feel like a trade-off. It is genuinely easy to make, endlessly customizable, and rich enough to satisfy even the toughest dessert craving. Give it a try this week — your post-workout treat game is about to change for good. Enjoy every bite!
Protein Cheesecake
Ingredients
Equipment
Method
- Take the cream cheese out of the refrigerator and let it come fully to room temperature, about 30 to 45 minutes.
- Preheat oven to 350 degrees F. Fill a baking pan about two-thirds full with water and place on the lower oven rack.
- Mix your crust ingredients together and press firmly into a 9-inch springform pan. Refrigerate for at least 1 hour before filling.
- In a food processor or with electric beaters, blend cream cheese, Greek yogurt, protein powder, sweetener, and vanilla extract just until smooth. Do not overbeat.
- Pour filling evenly over the chilled crust and smooth the top with a spatula. Place on the center oven rack above the water pan and bake for 30 minutes without opening the oven door.
- Without opening the oven, turn off the heat and let the cheesecake sit inside for 5 more minutes. Remove from oven and cool on the counter for 20 minutes.
- Refrigerate for at least 6 hours or overnight until firm and easily sliceable. Run a warm knife along the edge before unlatching the springform pan.


")